Total Pageviews

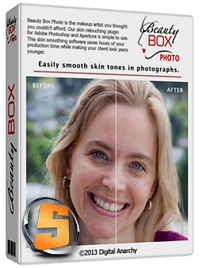
Download Beauty Box 3.0 Plugin for Photoshop

Download this plugin for Adobe Photoshop cs2,cs3,cs4,cs5 and cs6.


Key Plugin Features:


Quickly and easily erases skin blemishes for younger skin.
Keep important details like eyes, teeth and hair razor-sharp.
Now works in Aperture and Photoshop CS5.

Tutorials for Beauty Box Photo


Beauty Box Photo is easy to use. You almost don’t need tutorials to use the software! It’s always good to see how you can push skin retouching software to perform even better than we imagined, so read on.

Beauty Box Photo Product Manual


Download the Beauty Box Photo 3.0 manual for detailed information about the plugins tools, functions and concepts.
Download Beauty Box 3 manual pdf
7.9 mb

DOWNLOADING LINKS:


CLICK HERE TO DOWNLOAD

if doesn't work CLick here

Computer Related Full Forms and Formats

These abbreviations are very useful for all the tech lovers who want to seek and increase their knowledge about computer.


* AVI = Audio Video Interleave
* RTS = Real Time Streaming
* SIS = Symbian OS Installer File
* AMR = Adaptive Multi-Rate Codec
* JAD = Java Application Descriptor
* JAR = Java Archive
* JAD = Java Application Descriptor
* 3GPP = 3rd Generation Partnership
Project
* 3GP = 3rd Generation Project
* MP3 = MPEG player lll
* MP4 = MPEG-4 video file
* AAC = Advanced Audio Coding
* GIF = Graphic Interchangeable
Format
* JPEG = Joint Photographic Expert
Group
* BMP = Bitmap
* SWF = Shock Wave Flash
* WMV = Windows Media Video
* WMA = Windows Media Audio
* WAV = Waveform Audio
* PNG = Portable Network Graphics
* DOC = Document (Microsoft
Corporation)
* PDF = Portable Document Format
* M3G = Mobile 3D Graphics
* M4A = MPEG-4 Audio File
* NTH = Nokia Theme (series 40)
* THM = Themes (SonyEricsson)
* MMF = Synthetic Music Mobile
Application File
* NRT = Nokia Ringtone
* XMF = Extensible Music File
* WBMP = Wireless Bitmap Image
* DVX = DivX Video
* HTML = Hyper Text Markup
Language
* WML = Wireless Markup Language
* CD - Compact Disk.
* DVD - Digital Versatile Disk.
* CRT - Cathode Ray Tube.
* DAT - Digital Audio Tape.
* DOS - Disk Operating System.
* GUI - Graphical User Interface.
* HTTP - Hyper Text Transfer Protocol.
* IP - Internet Protocol.
* ISP - Internet Service Provider.
* TCP - Transmission Control Protocol.
* UPS - UninterruptiblePower Supply.
* URL - Uniform Resource Locator.
* USB - Universal Serial Bus.
* VIRUS - Vital Information Resource
Under Seized.
* 3G - 3rd Generation.
* GSM - Global System for Mobile
Communication.
* CDMA - Code Divison Multiple
Access.
* UMTS - Universal Mobile
Telecommunication System.
* SIM - Subscriber Identity Module.
* HSDPA - High Speed Downlink
Packet Access.
* EDGE - Enhanced Data Rate for
GSM [ Global System for Mobile
Communication] Evolution.
* VHF - Very High Frequency.
* UHF - Ultra High Frequency.
* GPRS - General Packet Radio
Service.
* WAP - Wireless Application Protocol.
* TCP - Transmission Control
Protocol .
* ARPANET - Advanced Research
Project Agency Network.
* IBM - Internation Business Machine
Corporation.
* HP - Hewlett Packard.
* AM/FM - Amplitude/ Frequency
Modulation.
* WLAN - Wireless Local Area Network

UC Browser 9.3.2 .APK Download [Latest]

UC Browser for Android provides you FAST and SMOOTH Web surfing experience.

It's a totally free mobile browser. Adaptable configuration helps you adjust your way of browsing under different network connections, allowing you to reduce data costs and speed up page loading with compression. Android 4.3 is supported in the newest version.


Screenshot:

New Features:


1. AutoPager

Create a seamless reading experience with the next page being automatically loaded when you reach the end of your current page. It works on the lite version of popular sites like Google, Twitter, Facebook and more.

2. Speed Mode II
An upgraded Speed Mode which automatically fetches the most suitable versions of webpages depending on your network condition.

3. Increased Download Speeds
Improved efficiency of network connections to double download speeds.

4. Download Photos from Facebook
Now you can download your favorite photos on Facebook and save to your phone.

5. Save Page
Add-on
The Save Page add-on is updated, and you can download it on UC Add-on Center or Google Play.

6. Facebook Video Uploader
Try this new Add-on that allows convenient uploading of videos to Facebook.

7. General Improvements
Optimization of typing, and Hindi support.


• Best Mobile Browser Awards 2011 – About.com

• Best Android Browser Awards 2012 -- About.com

• Top Downloaded Android Browser on Google Play in India

• The choice of 400 million users worldwide, UC Browser is definitely the most popular Web browser in the world.


DOWNLOADING LINKS:


Click here to download
13 mb

World's fastest SuperComputer : TIANHE 2


The Tianhe-2 supercomputer. (Credit: Top500)
Every six months, the Top500organization reveals its list of the world’s fastest supercomputers. And for the past few lists, there’s been a lot of movement. In June 2011, it was Japan’s “K” supercomputer. In June 2012, it was IBM‘s Sequoia. In November 2012, Craytook the lead with its Titan supercomputer. And now there’s a new fastest supercomputer – the Chinese Tianhe-2.

Tianhe-2 is built entirely with Intelprocessors. It contains 16,000 nodes, which each contain two Xeon IvyBridge processors and three Xeon Phi processors, for a total of 3,120,000 total processor cores. And those cores are doing the job. According to the benchmarks used by Top500, it performs a staggering 33.86 petaflop/s. That’s nearly twice as fast as Titan, which has a performance benchmark of 17.59 petaflop/s.
And just to show you how far things have come in just two and a half years, the Tianhe-1A performs at 2.56 petaflop/s. Don’t feel too bad for the old winner, thought – it’s still the 10th fastest supercomputer in the world.
Another aspect of the Tianhe-2 is that it shows how rapidly China is advancing in the world of IT. Although the processors may have come from Intel, everything else – from the design to the operating system – was developed in China.
Of course, that’s an exception as far as the list goes. As far as computer manufacturers go, IBM dominates the Top 500 list. Five of the top ten fastest supercomputers were built by IBM, as were 34 of the top 100. Cray and Fujitsualso have quite a few on the list as well. So while China may have the world’s fastest supercomputer, they still have plenty of competition.
You can check out the full list of the world’s 500 fastest supercomputers here.

UC Browser 9.0.2 .APK Download

Uc browser's new version 9.0.2


Fastest=>smooth Web surfing experience & ultimate download speed

Smartest=>Voice Control, Smart Gestures and Auto Fill make it intelligent

Most Popular=>Choice of 400 million users worldwide

=>Best Mobile Browser Awards 2012 and 2011 – About.com

=>No.1 Downloaded Android Browser on Google Play in India

Most Secure=>Incognito Browsing protects your privacy

Save Money=>reduce data costs with advanced compression technology

UC Browser is your ideal web browser!
Download and try the best android browser today!
You may have noticed about the changed logo of the classic UC orange!
We want to be orange just like our squirrel mascot to show we have the characteristic of a squirrel: fast, smart and enthusiastic!

New Features:


1.UI Enhancement: Multiple start screens with the ability to organize your Web apps into folders.

2.Watch Offline: Keep your favorite videos from webpages in your phone.

3.Customized Themes and Wallpapers: You can change the way your UC Browser looks by downloading themes and wallpapers from the UC Theme Center.

4.Incognito Browsing: For your convenience and privacy, when you activate Incognito Browsing your browsing history will not be recorded.

5.Ad Blocking: Intelligent blocking of advertisements in WWW sites without breaking the layout of the webpages.

6.Screen Shot: Take screen shots of any webpages and scribble what you want to mark on the shots.


DOWNLOADING LINKS:


Download here11.21 mb

On Google Play Store


Download Other versions:


DOWNLOAD UC BROWSER 9.0.1

UC Browser 9.0.1 .APK Download

Uc browser's new version 9.0.1


Fastest=>smooth Web surfing experience & ultimate download speed

Smartest=>Voice Control, Smart Gestures and Auto Fill make it intelligent

Most Popular=>Choice of 400 million users worldwide

=>Best Mobile Browser Awards 2012 and 2011 – About.com

=>No.1 Downloaded Android Browser on Google Play in India

Most Secure=>Incognito Browsing protects your privacy

Save Money=>reduce data costs with advanced compression technology

UC Browser is your ideal web browser!
Download and try the best android browser today!
You may have noticed about the changed logo of the classic UC orange!
We want to be orange just like our squirrel mascot to show we have the characteristic of a squirrel: fast, smart and enthusiastic!

New Features:


1.UI Enhancement: Multiple start screens with the ability to organize your Web apps into folders.

2.Watch Offline: Keep your favorite videos from webpages in your phone.

3.Customized Themes and Wallpapers: You can change the way your UC Browser looks by downloading themes and wallpapers from the UC Theme Center.

4.Incognito Browsing: For your convenience and privacy, when you activate Incognito Browsing your browsing history will not be recorded.

5.Ad Blocking: Intelligent blocking of advertisements in WWW sites without breaking the layout of the webpages.

6.Screen Shot: Take screen shots of any webpages and scribble what you want to mark on the shots.


DOWNLOADING LINKS:


Download here11 mb

Top Online typing Websites to Boost typing

#1 TYPINGTEST.COM


A website by typing master computer typing software company that offers you to type online, take tests and play games all online.
© 1992-2013 TypingMaster


#2 POWERTYPING.COM


PowerTyping is an online free typing tutor for Qwerty - US standard 101 keyboard and Dvorak keyboard - the US alternative ANSI standard keyboard.
Our typing tutor offers:

1.free online typing lessons for QWERTY and Dvorak

2.typing practice where one can enter and practice own text

3.various practice stories used in a form of typing tests

4.typing games
Qwerty lessons have aradiothere. Turn it on while practicing. The idea is to type an exercise to the rhythm of music to encourage an even pace, error free typing. Songs have listed speed of the rhythm in wpm.
Lessons' progress is maintained on your computer as a cookie.
Visit Here


#3 kEYBR.com


Enter Keybr.com — the flash–based typing instructor you’ve been waiting for!
Keybr.com is very straightforward. You can choose from three basic lessons that start with a certain number of keys on the keyboard, and then, as you progress through the lessons, more keys are introduced to the mix to make things a little tougher. As an added bonus, our software keeps track of all your mistakes and your words–per–minute (wpm) — and even creates graphs of your day–by–day performance.
VISIT HERE

TypeRacer.com


The online typing competition, TypeRacer, is a multiplayer typing game where you compete with other players by typing quotes from popular books, movies, and songs.

You can install TypeRacer on Facebook, Myspace, Orkut, Hi5, or Netlog  and you can also test your typing speed in Chinese, French, Japanese and many other languages.

Visit Here

#5 Freetypinggame.net


There are 10 different free typing games and each of them has three levels: beginner, Intermediate and advanced. You can boost your skills while playing games.
VISIT HERE

Hard Copy :Take screenshots & edit computer screen

Hard Copy


Hard copy is the windows application that can be used to take screenshot of your current computer window or the whole screen. It works with both windows xp and 7. But as you know in windows 7 there is a best screenshot app i.e. Snipping tool to take screen shot according to your requirement. But in windows xp you do not have such tool and therefore the hardcopy (hc) app works.


DOWNLOADING LINK:


Direct Download Link
6.84 mb

WinUSB Maker v 2.0 Make Bootable USB Pendrive Tutorial

WinUSB Maker v2.0 Public Beta Release 2

How To Make a Bootable Pen Drive (USB Flash)

New Features: 

                Without any OS File-Mod - Your OS is clean transloaded to USB device.

USB OS Transload compatible with Windows XP / Vista / Server / 7 / 8.
Low memory and CPU usage for an fast OS Transload.
Metro-UI Based compatible with Windows XP.
Compatile with all Microsoft OS with .NET Framework v4.0.
Backup and Restore is compatible only with the same device.
MSDOS and GRLDR (Grub4DOS) compatible transload.
Memory protections and code defuse improved.

Requirements:  

  • You must have installed the Microsoft .NET Framework version 4.0 to use this software.
  • It is compatible with all versions of  windows xp and 7.
  • It will work fine on 512 mb of RAM.
  • Successfully working on Pentium 4 Intel processor, hoping you have better than it.

Tutorial:

First of all you have to download the software WinUSB maker v 2.0.  It is a small software just of 3 mb after extraction.When you have completed your download then extract it using any software you like i.e WinRar etc.
First of all you open the folder WinUSB Maker and double click on the USB signed icon. This is our application. It will directly run if Microsoft .NET framework 4.0 is installed on your PC. It is a Portable App so you do not have to install it.
When you double click on the application, the following screen will display.  
                                      
Now attach your USB Pen drive into the USB port of your PC and after waiting sometime click on the COMPATIBLE DEVICES NOT FOUND drop down menu and select the Drive for example it is usually named as F: or G:.
Now it is time to insert the CD/DVD of your Microsoft Windows setup and wait till it loads. After a half minute Click on the "SETUP TO USB" option in the left pane in the software as shown below:  

                                      
Then click on the first option as shown above and now if you have the CD of Windows then you have to select the option :"I WANT TO WORK WITH A DIRECTORY." and click on "SELECT ON ISO OR DIRECTORY" button to proceed.  
                     Now you will see a pop up window of  Browse For Folder then select the CD Drive folder as shown below:
                             
Then press OK button to proceed.Then click on "Make Bootable USB" and proceed. As you can see in the below picture it will start processing the task. First of all it will ask your permission to Format your USB pendrive. When you press Ok it will format the usb and start copying the files from your CD to USB.

                              
Let it get finished.
THAT'S IT.
IMPORTANT WAYS IF ABOVE IS NOT SUITABLE TO YOU:

  • If you have the .iso image of the windows version you want to boot then you can select the option of  "I WANT TO WORK WITH THE ISO IMAGE FILE". and then locate the file in the hard disk.
  • If you have the copy of Windows Disk in a folder then you should select the "I WANT TO WORK WITH DIRECTORY".

Best websites to free download Portable Apps PART 2

Please visit this post first BEST SITES PART 1 To enjoy full post


Pendriveapps


The website has very big collection and has an organized directory that actually is similar to Portable Freeware; however, just structured in a different way.
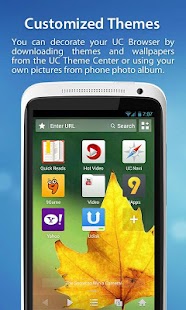
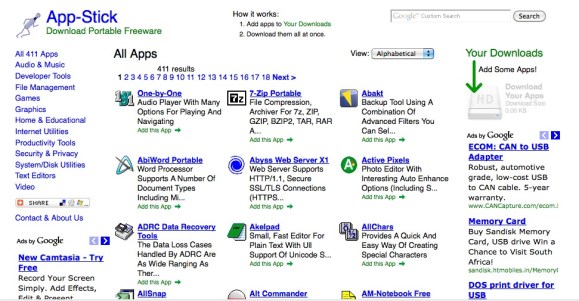
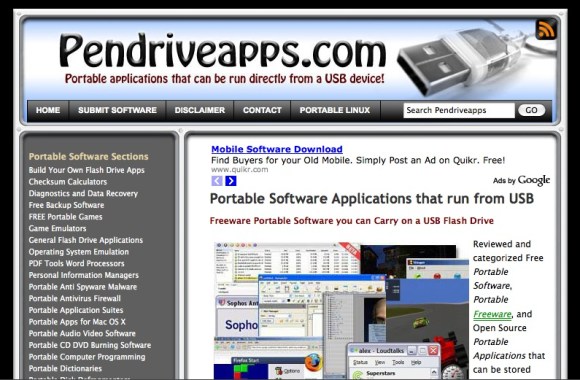
On left side, you could check the sections as well as select what you are in search of. All the reviewed portable tools, portable applications, portable utilities and portable games can be neatly found categorized in the corresponding portable software section located in sidebar to the left. In right side, you could find the recent five software added on this site. You can get media player, antivirus, IRC clients, disk defragmenters, email software, file managers, system tools, translators, web servers, folder utilities, encryption utilities, browsers, messengers, and a lot more than these.
Pendriveapps.com

LinuxLive


USBLinuxLiveUSB is an open-source and free software for Windows. This will help you throughout in the journey of invention with Linux. It creates portable, virtualized and bootable USB stick running the Linux. This is intended to be utilized by both the geeks and the beginners.If you’re a beginner, it will let you to try out Linux for the very first time, keeping your Windows clean of all modifications. And if you’re a geek, it will let you to test approximately any Linux distributions from Windows directly, or just install those from any USB flash drive rather than CDs.
LinuxliveusbLinuxLive USB is a completely open source and free software only for Windows. It has been designed with straightforwardness in mind and can be utilized by anybody. All you need to do is pick up the Linux in your list and then give that a try at least. Having the Live USB is better than simply using the Live CD as you even can save your data as well as install software. The feature is known as persistence. Another feature of LinusLiveUSB is SmartClean which uninstalls properly any preceding Live USB installation and SmartDownload allows you to download a supported Linux in just 2 clicks automatically choosing the most excellent way to download from. LinusLiveUSB supports lots of Linux distributions including Ubuntu, Debian, OpenSUSE, Fedora, Mint, Slax, ArchLinux, Gentoo, CentOS, PCLinuxOS, Sabayon, Puppy Linux, BackTrack, and a lot more.

PortableFreeware


The Portable Freeware has a superb collection on the web where you can come across any portable apps of any type. You can select them as you want and it is available for 100 percent free of cost completely. All apps are free therefore you don’t have to pay a single penny and just select what you wish for and then start downloading. Whenever you visit This Portable Freeware Collection site it right away sorts all the entries by the latest or newest uploaded apps, though you can clip it in order that it displays the most famous applications in a perfect order. You also can just search whatever application you are in search of easily.
PortablefreewareLet us know if you have any other website in your bookmarks which allow you to download portable apps for free. We will love to share them with our readers.

Best websites to free download Portable Apps PART 1

Portable Apps as the name suggests is an app which can be used on the run. You only need a USB drive or Flash Drive to keep the Apps.
These apps are very useful for almost every user in a way or two. Ranging from entertainment to the business services you can have your favorite application in your pocket and run it on any computer available.
I personally use these application quite a lot and I love the idea of not carrying a laptop every-time I go outside for a trip. So, let’s dig deep into these websites and find the appropriate apps that can help you anytime anywhere.

PortableApps


PortableApps.com is now the world’s most famous portable software solution permitting you to take up your preferred software with you. It is Grand Daddy of the portable application sites. This PortableApps suite includes the basics such as Firefox for surfing and Pidgin for immediate messaging however also includes—in full package—the Open Office. You can download all individual portable elements separately of course; however, what actually ties everything jointly is the menu system of PortableApps.
PortableApps is a free and fully open source platform, and it works very well on all portable storage devices (USB flash drive, portable hard drive, memory card, etc), cloud drive (Google Drive, DropBox, etc), or locally installed ones. With about millions of users across the world and full collection of the open source software in addition to commercial software and compatible freeware and partners in hardware and software industry, PortableApps is the most inclusive solution for everyone on the go. This PortableApps.com platform is fully-featured portable backup utility, software menu, app store, application management and automatic updater system which ties all the portable apps together plus allows you to build your custom portable app set. Add new apps using this portable app store, manage them by folder or category, choose the color and look you want and update everything automatically, all with one simple-to-use system.

App-Stick


It is just about the freeware, no “shareware”, demos or trialware and the like. There’s no limit to number of apps which you can add provided that the full file size is just lesser than 50 MB. In case the download exceed 50 MB, download the main app, and you can then come back later for more.
App-Stick.com

Liberkey


It doesn’t have a polished menu similar to what is found in PortableApps suite; however, its menu is conveniently and functional arranged by program kind. 
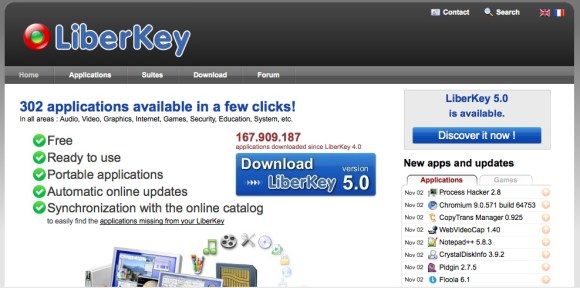
LiberKey opts to place things in categories that are labeled as per what they do, thus even if you’ve not seen any application which is included in LiberKey suite you’ll still have a fairly fine idea that it’s the Security Tool or Color Picker based on folder which you locate it in. This is a helpful feature if Ultimate installation installs approximately 250 applications—you’re certain to see fairly a few that you’ve never utilized before.
Liberkey.com


PortableLinuxApps


Lots of us have faced that running the portable apps on Windows was good but way too limiting. Booting any computer in a distinct OS gives the users an ability to run machine as their very own without any risks to the native OS on the particular machine. You can come across lots of Linux distributions that can be tweaked or modified to run off any portable drive. 
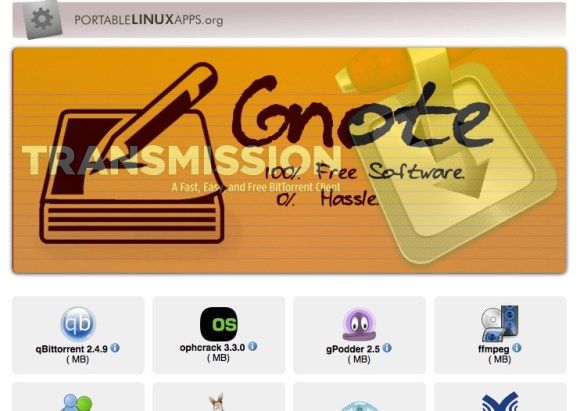
PortableLinuxApps are apps which run on most of the 32-bits Linux-based operating system, such as the Ubuntu, the Fedora, the debian and derivatives. These are bundled in self-containing files that is 1 app is equal to 1 file. To make use of them, just download, the chmod a and x, and then run it. AppImageKit permits you to bundle apps without dependencies nicely other than base OS images.

Please visit 2nd part of this post that can help you find more apps. CLICK HERE TO GO TO PART 2

GOOGLE CHROME EXTENTION :Download apps from Google Play on PC

I'd recently posted about how to download games and applications from the Google Play Store directly on PC, even if you don't have access to internet through android phone. Read this post Download apps on Pc with Mobogenie.

But today I am posting a new method if the above method fails or not working for you for the following possible reasons:

  • You don't have administrative access on the PC.(because of school/college's restrictions.)
  • You don't want to download the software mobogenie due to additional data and time wastage.
  • Or any other reason.
.
Anyways the new method doesn't require you to download any software. But you have to download an extension for Google Chrome (also called Addon).

Here is the DOWNLOADING LINK of the extension: Click here. After downloading, install the extension or addon by double clicking on it. And you are done. To initiate you just have to enter the device id or country once. Now when you'll try to download any app from Google Play Store, then it will start downloading.
Please do comments if you like the post or if you have any queries. Thank you.

Mobogenie : Download google play android apps from PC

Mobogenie is the perfect Android phone manager.It is an All-in-One solution to manage andfulfils every need of Android user.It allows smooth switches between different function. Users can use PC internet to access and download apps,games and content while charging phone through USB cord. The all-in-one powerful android phone managerMobogenie helps you to control and manage your android phone from your PC.
Easy File Transfer

Did you ever wish you could carry the data in your PC on your phone? Mobogenie makes it possible! Transfer pictures, videos, music and other data between your PC and phone... all


SMS Manager

Relieve yourself of managing the scores of texts and ads in your inbox. Or send texts to multiple contacts on a special occasion!


DIRECT DOWNLOADING LINKS:

(for pc)
Version : 2.1.28 | Size : 16.4MBWindows 8/7/xp/2003/Vista
(FOR ANDROID)900kb approx.

How to Use after download .apk file :

Step 1: Run Mobogenie PC software
Step 2: Click "Install .apk" Icon & Click on "Add file"
Step 3: Select Mobogenie .Apk file & Click Open
Step 4: Click on "Confirm" button. This will start the import and install process. Once the install is completed. Import successful message will be show.

DART : Google's new programming language

Yes, The great Google has now introduced their own programming language. This is web app development language.


Dart is a new language for scalable web app engineering.

Dart is class based and object oriented, without being dogmatic(strict rules).


You can probably already read and even write Dart code. Sample code written in DART :
main(){// This is where the app starts executing. print( new Fibonacci ( 10 ));// Print a new object's value.}class Fibonacci {// Define a class.int original, fibo;// Declare variables.String toString()=>' $fibo';// Define a method using shorthand syntax. Fibonacci(int value):// Define a constructor with list initializer. original = value, fibo = fib(value){}staticint fib(int n){// Define a class method.if(n <2){// Control flow and expressions.return n;}else{return fib(n-1)+ fib(n-2);// Arithmetic operators.}}}

See more Samples.

Dart’s comprehensive libraries give you lots of choices.
Support for all modern browsers.
Dart web apps run in all modern browsers.
Dart is used to build amazing apps.

Dart Editor is the easiest way to get started, helping you edit, debug, and run Dart apps. When you download Dart Editor, you get other tools, as well:
Pub package manager
The easiest way to get and share Dart code, pub keeps your packages up to date, handling versioning and dependency.


DOWNLNADING LINKS :
Current stable version of Dart:30188
Download DART 64-bit (Linux)
Download DART 32-bit (Linux)

NOTE :Dart development tools do not support Windows XP. Dart Editor requires Java version 6 or higher.


Visit DART websiteAdd DART to your Google+ circle
Follow DART on Twitter

Now Google seach, gmail are officialy free in four network service provider

Yes now Google has started a new feature of 'freezone'. With its help you can browse free google search, gmail and check cricket score and much more.
Here is the link to the freezone CLICK TO GO.
Please note it works on a few countries with following service providers:
Supported carriers:
India
Airtel

Philippines
Globe

Sri Lanka
Dialog

Thailand
AIS

If you are unable to access Free Zone on a supported carrier, please click here

Tutorial 3: Working with Layers


WORKING WITH LAYERS                                                                                                                            

The layer have very important role in the photoshop. If you want to work on Photoshop, you should have
the knowledge of layers.
On the right side of your interface, you will see a tab called Layers. If you don't see any tab named 
'Layers' then you have to click on window and then tick the Layers option. Then you will see the following tab.
You will see the highlighted blue box it is our background layer. Means we can work on this layer and this layer will be the background of what we do. The white filled icon here is our layer's thumbnail i.e. the small view of our layer. 
Now I am giving you a brief description of all of the related terms. Below is the image of our canvas that contain the layer tab. And for your convenience, I have numbered all the options in the image so I can explain with visual experience.


1. Layer Visibility 
The label no. 1 is a kind of eye's icon. It is the visibility of a layer. If we click on the visibility of a particular layer, then the layer is disappeared from our main canvas. For example, if we have selected "Layer 1" and add some text using the TEXT tool (shortcut is T) then we will see the text on our canvas. If we click on the visibility icon of the text layer then the text will also get disappear from the canvas. Means the layer visibility icon of every layer decides that what to show or what to hide from the screen for a particular moment.

2. Layer Lock

The label no. 2 is the layer lock.You will see the lock icon on the background layer when you create a new document. The layer lock means that we cannot move the contents of  the locked layer. If we select the MOVE tool (V) and then try to move the  background layer, then it won't allow you to move anything. To unlock a layer we must double click on the Background Layer or any other layer that is locked.

3. Opacity and Fill

The label no. 3 tells about the Opacity and fill. Opacity of a layer is basically a type of transparency of that layer. Initially, the opacity of a layer is 100% i.e. maximum. We can lower the opacity of "Layer 1" by clicking on opacity's level and reduce it as per our requirement. Fill is a property that controls the fill amount of content. For example, if we have a text written with red colour, and we think that the red text has too much contrast or its too dark. Then we can lower the fill amount of the text. The difference between Opacity and Fill is that Opacity controls the transparency of the whole layer and the Fill controls the transparency of a   particular boundary i.e. a text etc.The other parts of the layer will not affected during the Fill operation.

4. Blending Mode

The label no. 4 tells about the Blending mode of the particular layer. Blending mode is basically intermixing of  two layers. In our houses, we have the Blenders to blend two or more elements. You can change the blending mode of any layer. There are a variety of options provided in the drop down menu. But the Blending will work only if we have multiple layers and at least two layers contain some common filled part. The Blending of a layer can also be accessed by just double clicking on a unlocked layer. We will discuss more about Blending in future.

5. Layer Thumbnail

The label no. 5 is the thumbnail of current layer that actually helps us know about what the layer contains. For example, if our layer is filled with black colour then the layer thumbnail will also be fully black. If we have multiple visible layers in our single document and each layer contains some object. Then we can easily come to know that what the layer is containing just by clicking on the thumbnail of a layer by pressing and holding the Ctrl button of the keyboard. Then a selection will be made around the content of the particular layer. The selection can be unselected by pressing Ctrl+D buttons together.

6. Linking Layers

If  you have two layers and you have to link the two layers. Then select the layers together by clicking on a layer first and then click the other layer while holding the Ctrl button of keyboard. And hence when more than two layers are selected then the icon of link layer will be visible to be clicked. It is used to link layers to share common characteristics.

7. Layer Style

If we have created a text above a layer then while selecting the text layer click on the "fx" icon at the bottom of layer tab. It is called the "Layer Style". As name suggests, its like add styles to our layer. By clicking we see the drop menu containing the plenty of options like Drop Shadow, Inner Shadow, Outer Shadow, Inner Glow, Outer Glow, Gradient etc. We can apply any of the layer style to our text layer or any as per our requirement. For example, we can add Drop Shadow to our text etc. To change the layer style of a particular layer, we have to double click on that layer and the layer style box will be popped up.

8. Layer Mask

The layer mask is a little bit difficult to understand. Masking is the process of taking a selection of one layer to mask the other layer. If we have two layers, one of them is a text layer containing orange text and other is a simple layer filled with black colour. If we Ctrl click the text layer's thumbnail, then we see that our text is selected then we have to click on the black filled layer and then click on the Add a layer mask button. Then what you will see that is we have a black coloured text with no background black colour.

9. Adjustment Layer

The label no. 9 is the button of 'create or fill adjustment layer'. While a layer selected, click on the half black circle icon i.e. the 'Adjustment Layer' icon, then you will see the variety of options like Solid colour (to fill the layer with a selected colour), Gradient (add gradient), Pattern (insert pattern), Levels (change the levels), Curves, Hue/Saturation (change the colors and lightness), Black&White etc.

10. Groups

If our document contains too many layers. So it become complicated to deal with the layers. Or if we later on change our mind about any part of layer then it may be difficult to locate a particular item. Then an important function that can solve our problem is a "Group". If we want to combine two or more similar layers in a group then select the layers by Ctrl-clicking the layers and then click on Group icon. Or press Ctrl-G buttons together to group the layers. So if we want to add some adjustment or layer style to some layers then we can apply that easily to the group of layers.

11. New Layer

By the way, I have to write this point on the top of the points. Okay, the icon is used to create a New layer above the selected layer. If we want the layer to be created below the selected layer, then Ctrl-click on the new layer icon.

12. Delete Layer

If you do not want a layer to be placed in the layer's tab then click on a layer you hate or you want to remove and click on Delete icon at the end of layer tab. Or you can also press the Delete button to delete the layer. You can also delete multiple layers by clicking this icon. Or you can right click on a layer to delete that.

13. Tab Options

At the upper right corner of the tab, you will see a down-arrow menu. When you click on that you will find some options that you have recently read about above in this post like New layer, Delete layer, Mask, Blending options etc. There are also some options like Merge Layers, Merge down etc. Merging can be done only if two or more layers are selected. Meaning of merging is to merge or collectively combine all the selected layers into a single layer. You can also merge layers by selecting at least two layer and then right click on any one of the selected layer and then click on Merge layers.

14. Layers Menu

The Layers Menu at the top of interface contains all the options you have read till now in this post. It contains  options like New layer, Delete, Adjustment, Merge, Mask, Layer style, blending and grouping etc.
Hence my so long article stops here and hope you learn something good from my article. Hope you like it. Please do comment if you didn't understand a single line of my post or any of the above points. Also Share with your friends.

Tutorial 2: Working with Gradient


I hope you have installed the Adobe Photoshop on your pc. I am posting all my tutorials using the Photoshop 
CS5. You can work with any version you like.
In this tutorial, I am telling you how to work with gradient tool.

Create a new document by clicking on File > New. Then choose the file size to 1980 pixel width and 1200 pixel height. You can choose any size according to your requirement.
new-document

For this you have to press the G button on your keyboard or you can click on the icon of gradient tool in the tool menu as shown below.
gradient-icon
 Then click on the color box below the Image menu of menu bar the icon is shown below.
gradient-editor
The Gradient Editor will be popped up as shown below. You will see the color stops there. Then double click on the left bottom color stop (as highlighted) to open the color picker.


gradient-editor


 Then you will see the box having # outside it and some code inside it(it is the hexadecimal color code).
color-picker
  Then edit it to 4f4a46 and the next stop's color code to 19191a similarly. Then click ok to accept.
                                      gradient-editor
 Then on the white background, click and hold on the lower part of our canvas. Then extend it to the
upper portion of document as shown in image below.
draw-gradient

The you will see the two colors intermixed and the result is obtained. Below is the final result.
                                gradient-result

Recent Comments